This fun fold was something I was thinking about in bed last night. I know, I should have been sleeping. But, sometimes, ideas come to me at the strangest times. When I get up in the morning, I start my routine and often forget to jot down notes. Around lunchtime i pour another cup of coffee and begin to think about what I hope to demo. Sometimes, I forget for days the ideas I had, but not today!
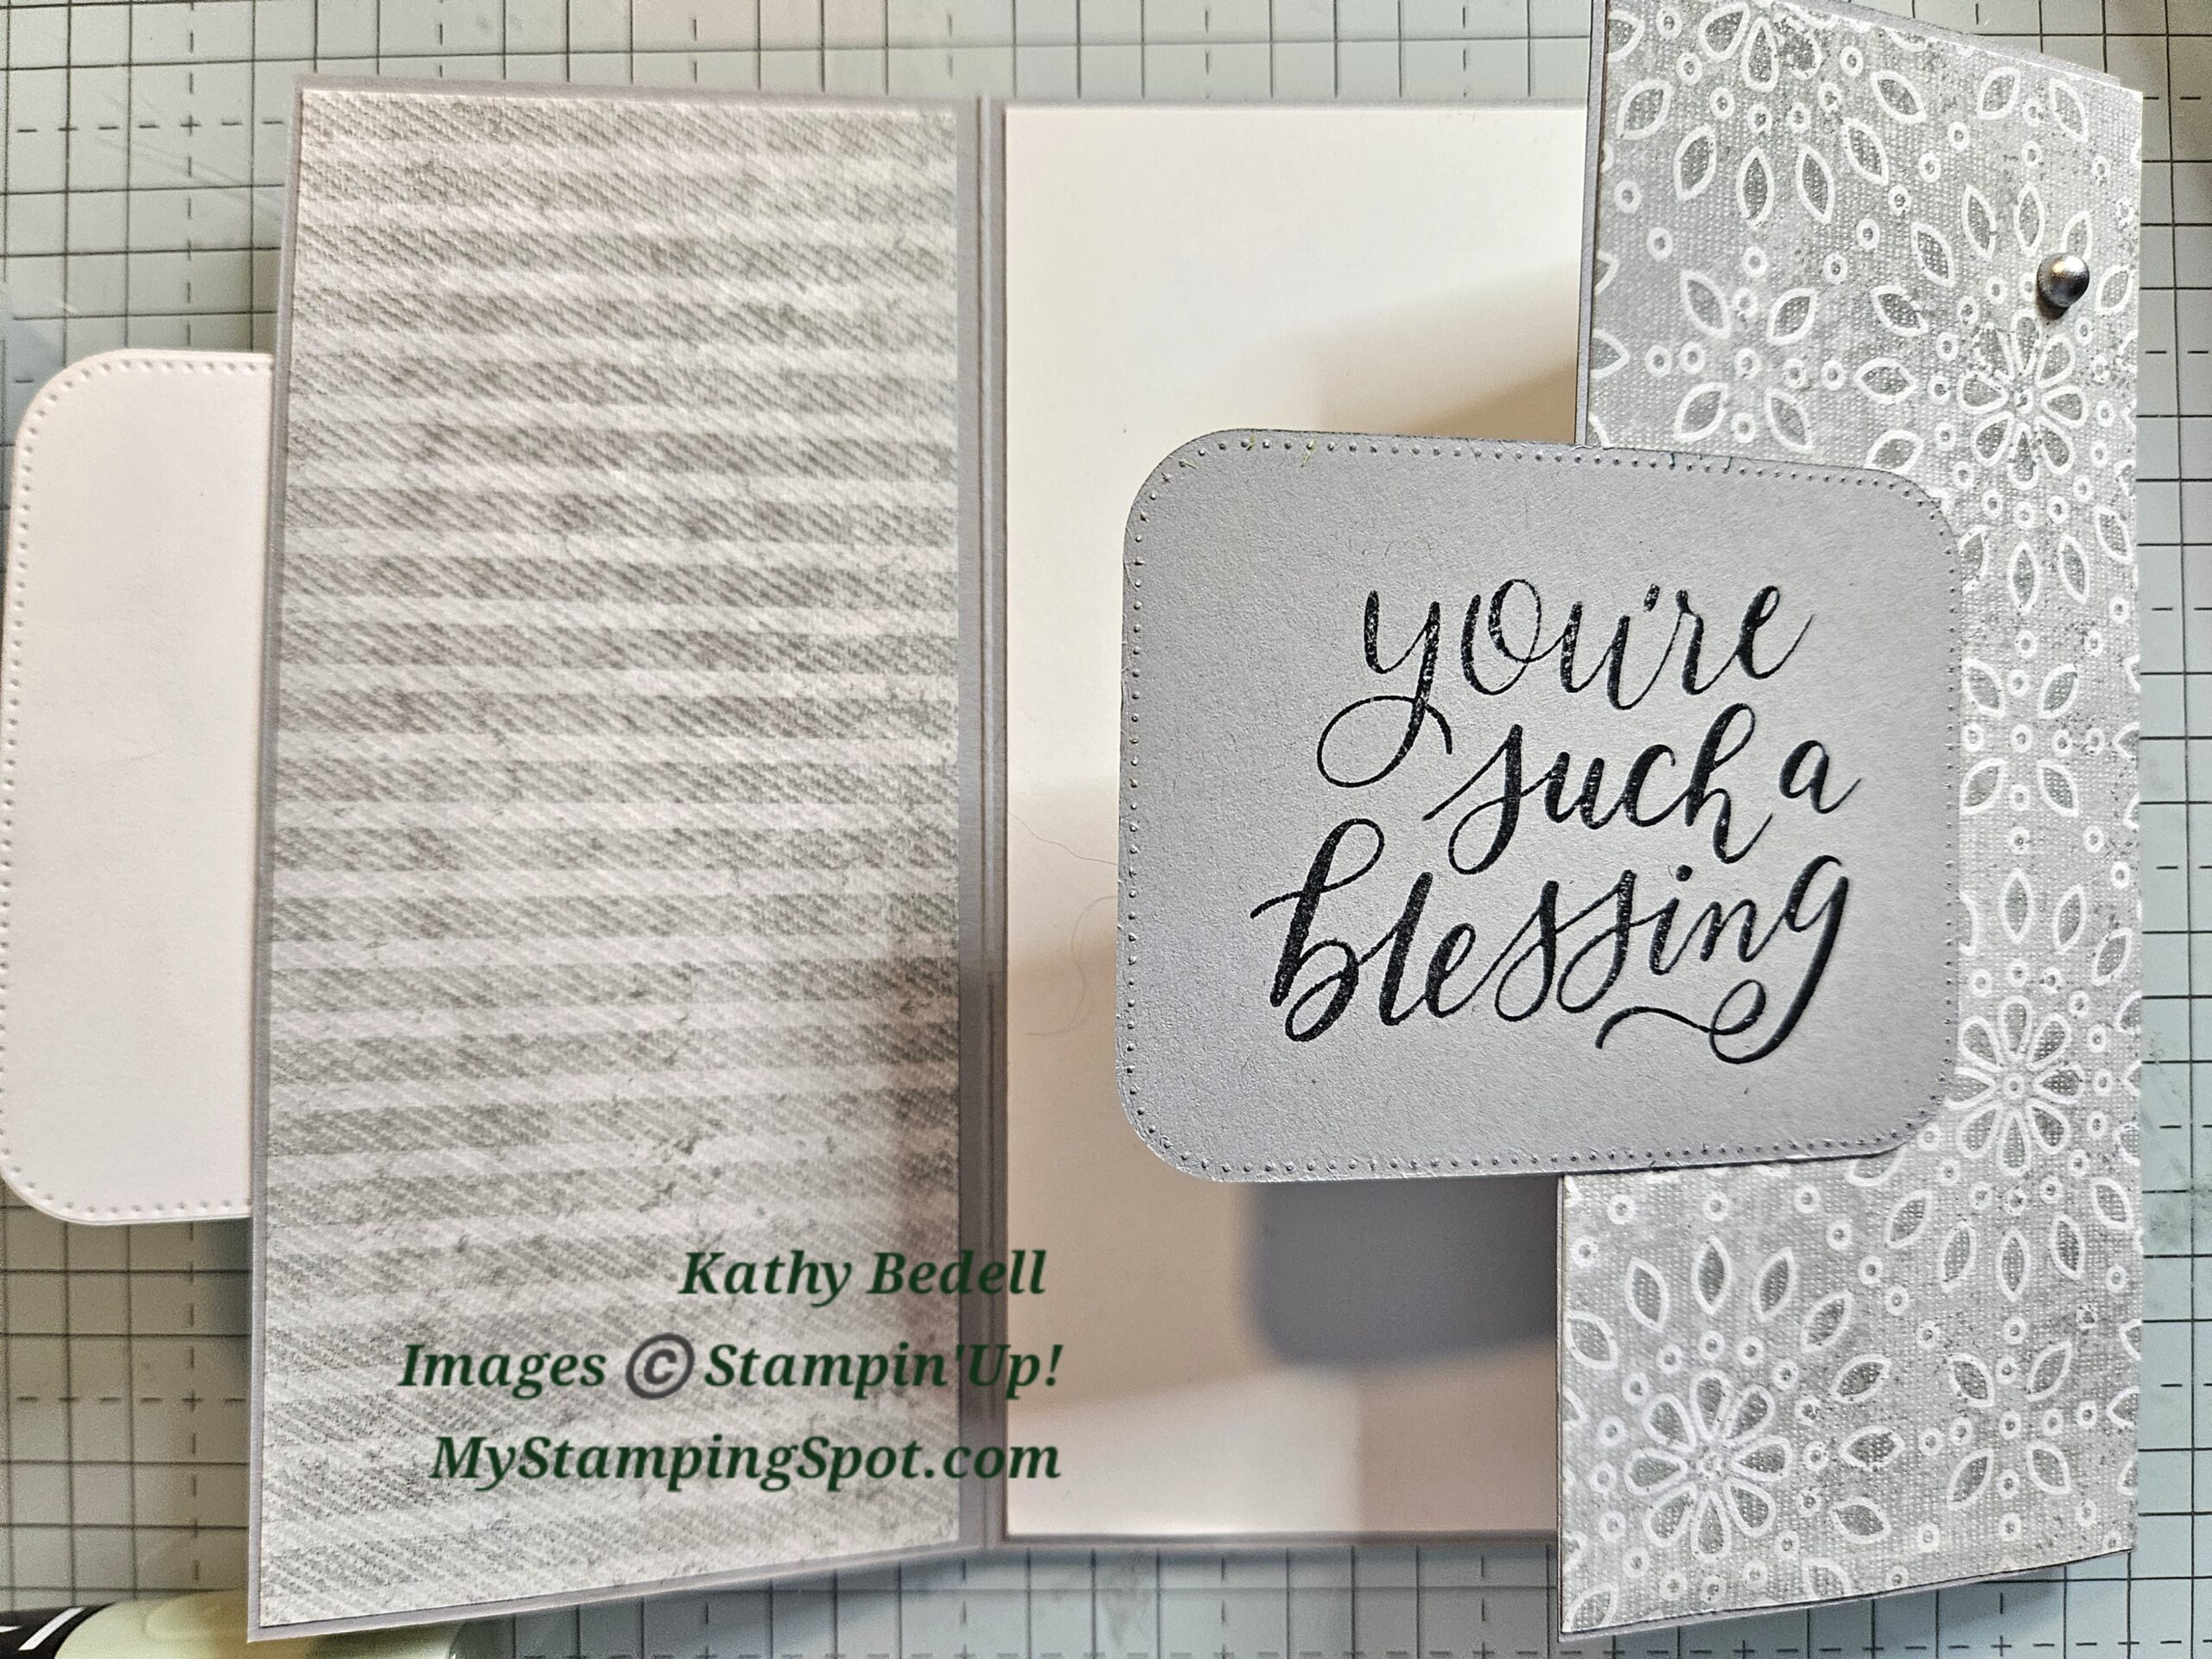
This card is a twist on a gatefold card. Instead of the two front panels meeting, they actually overlap. So, therefore, I will call it an overlapping gatefold.
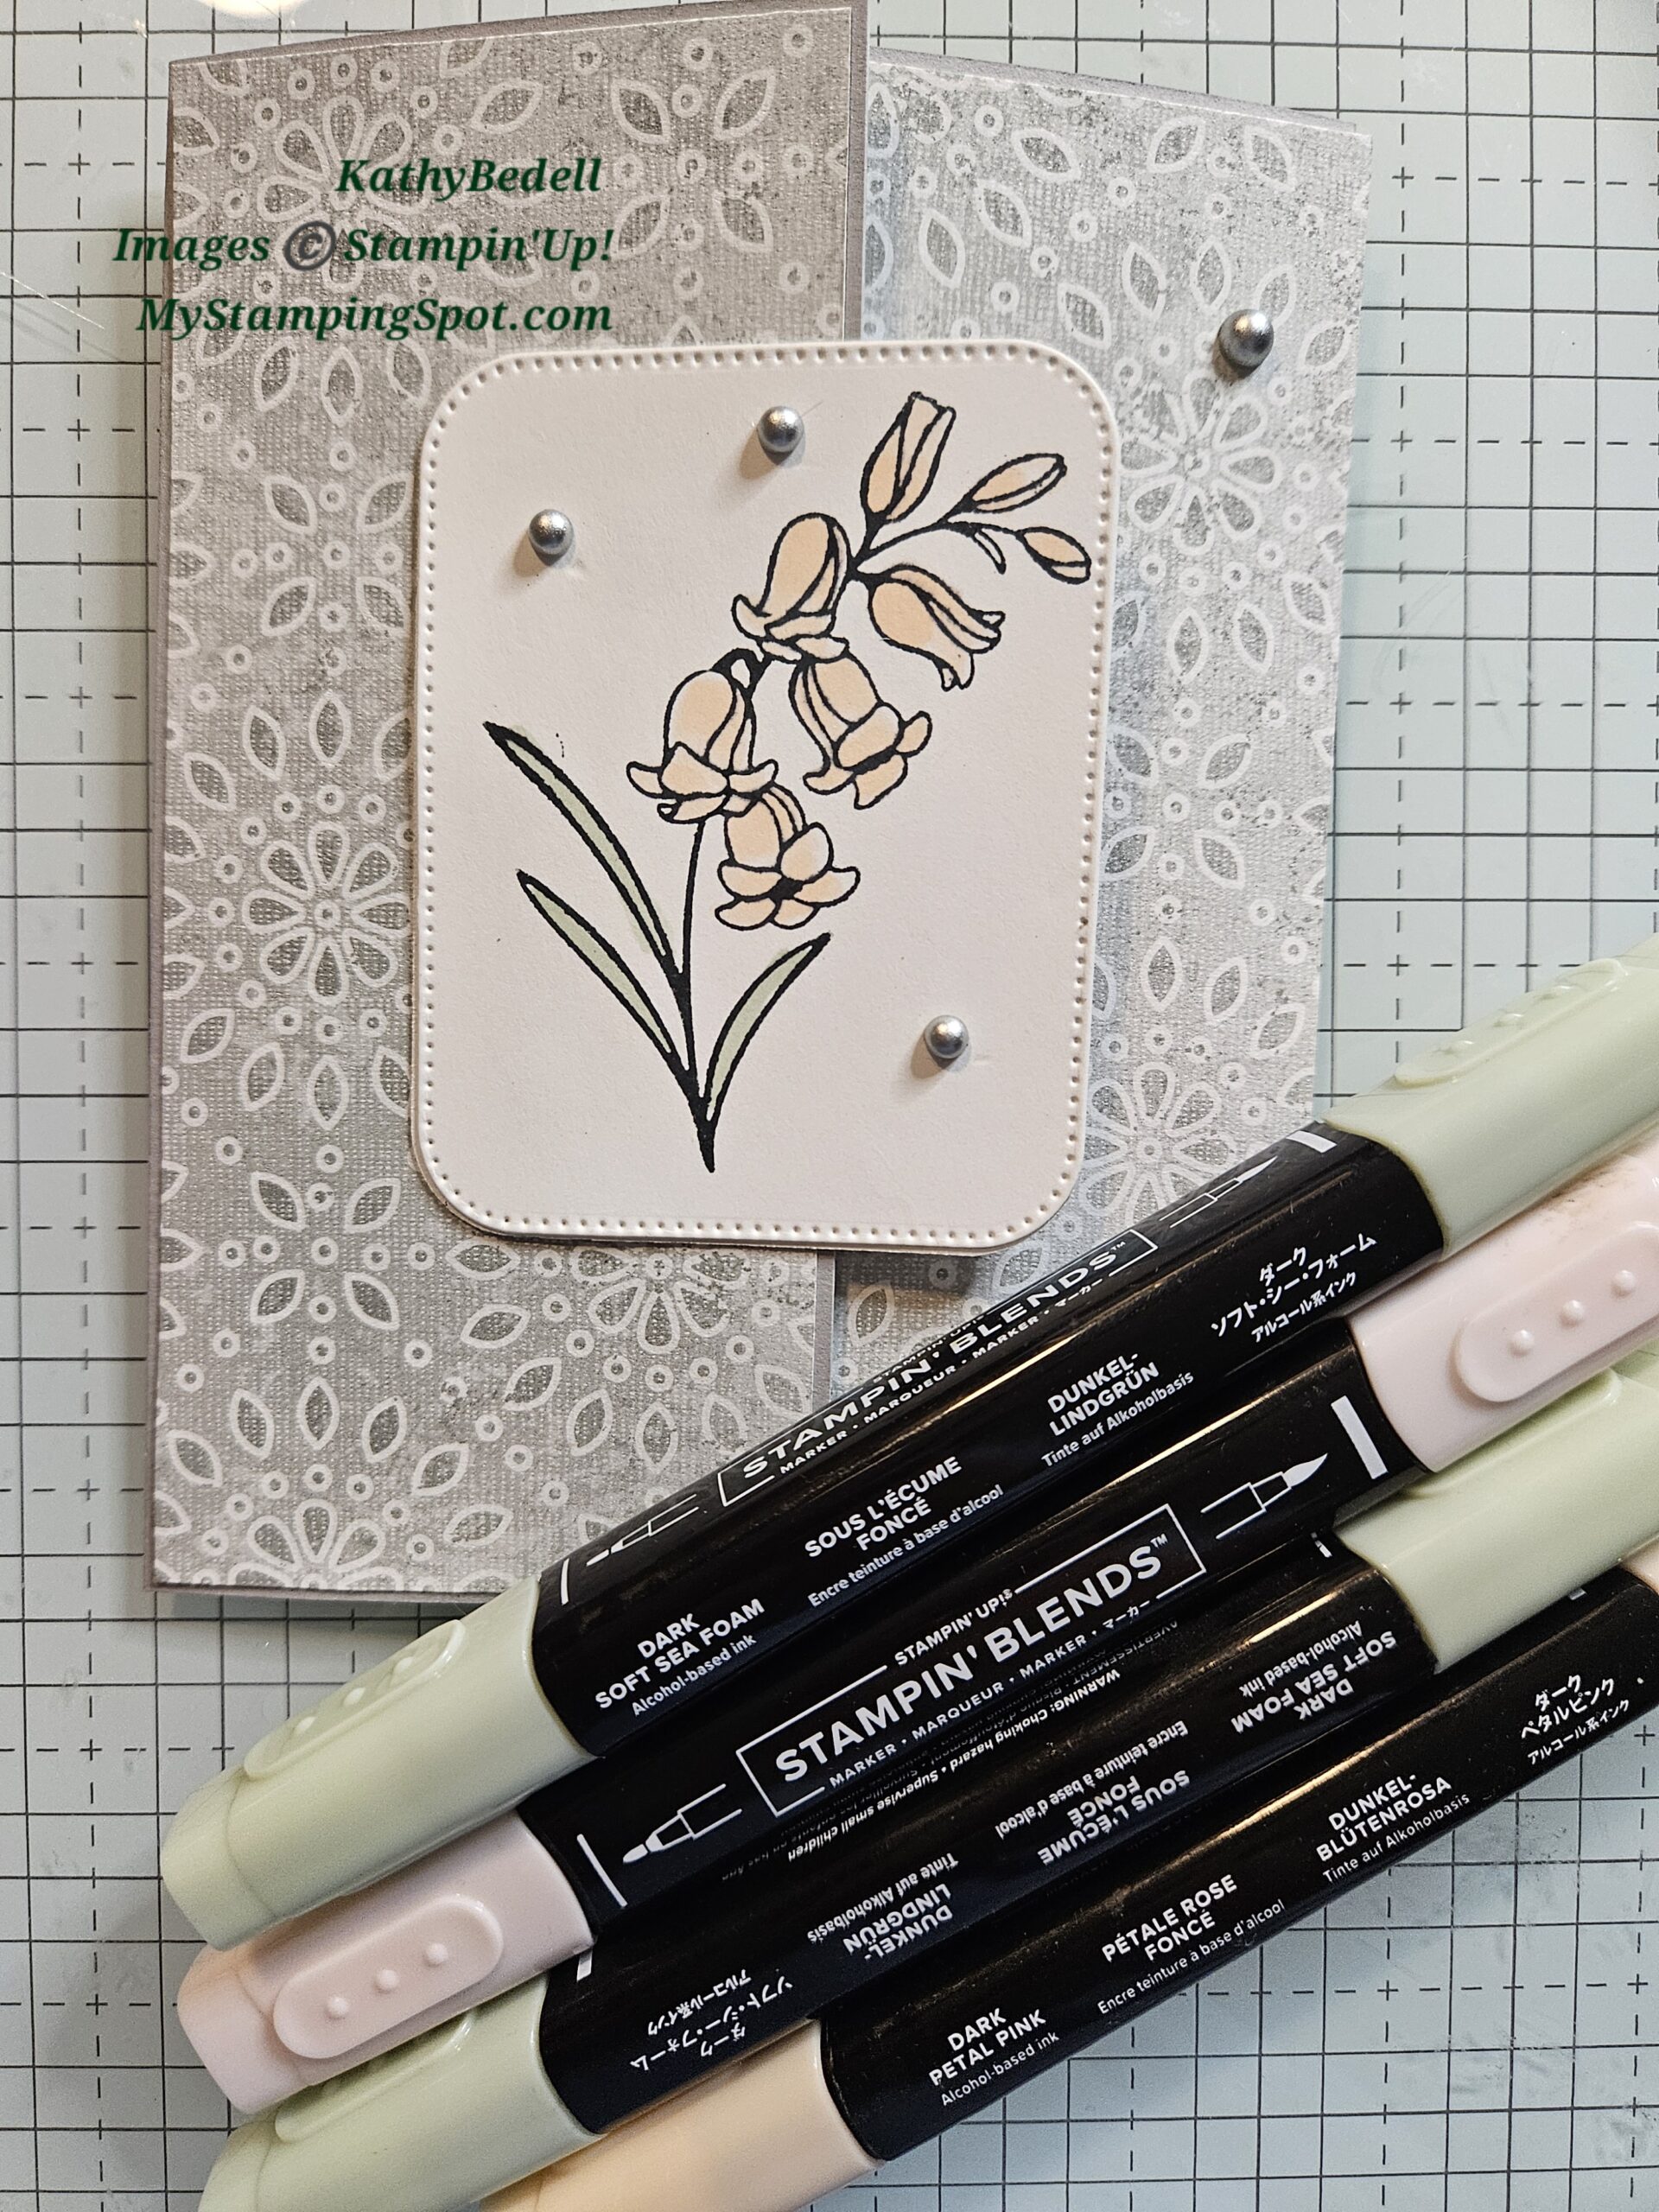
The stamp set I choose for this card was one that I had missed. You see, My SCbM and Christmas Club members earn a $25 gift card when they purchase 6 kits (not necessarily congruent). Anyway, one stamper chose to redeem her gift card for this stamp set. Well, I just fell in love with it! I love the big heartfelt greetings paired with the minimalist style images. it is the perfect pairing!
Stamps: Grateful Blessings (#163689)
Inks: Soft Seafoam ink pad (#147102), Momento ink pad (@132708), Petal Pink (#154893) and Soft Seafoam (#154902) Blends
Card stock: Smokey Slate (#131202) cut to 9 1/4″ x 5 1/2″, scored at 2 1/2″ and 6 3/4″ plus scrap for die cutting
Country Lace 12 x 12 DSP (#163415) cut to 2 1/8″ x 5 3/8″–cut four pieces
Basic white (# 159276) cut to 4 1/8″ x 5 3/8″ plus scrap for die cutting
Accessories: Nested Essential Dies (#161597), Basic Gray & Smokey Slate Pearls (#163416)
Assembly:
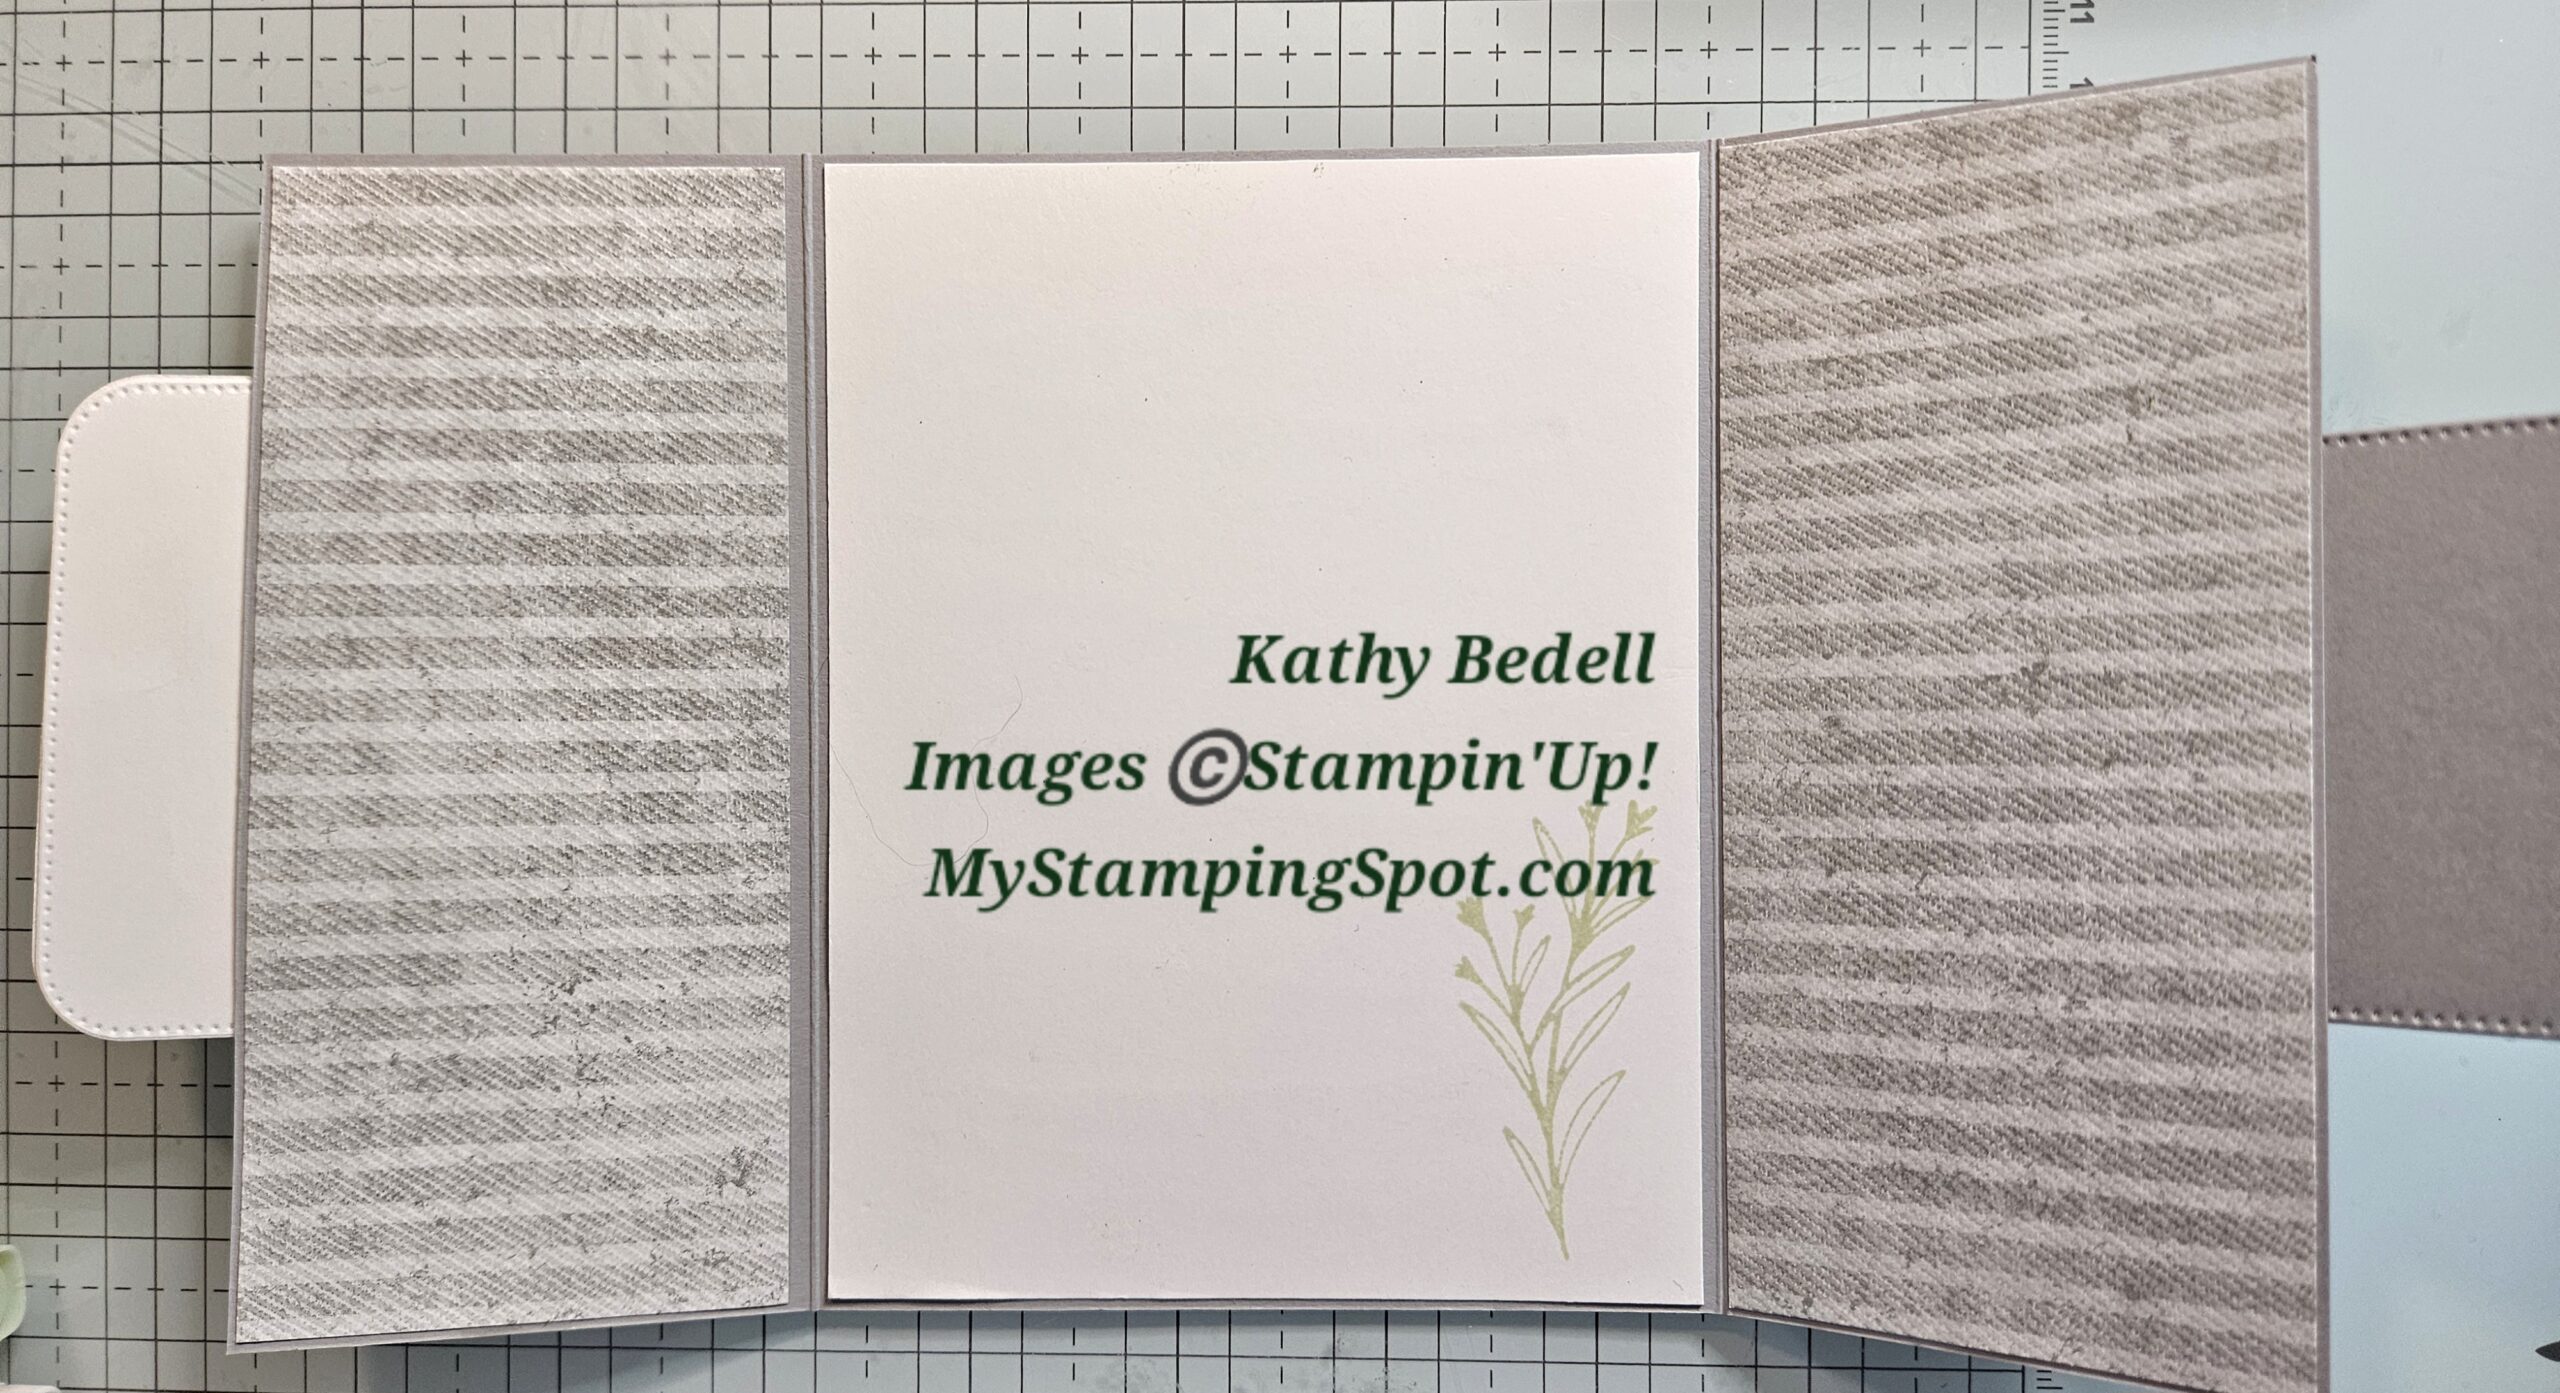
- Fold the card base on the two score lines. Add two pieces of DSP to the two card front flaps. Next add two pieces of DSP to the inside card flaps. ***note that I used a different pattern of the card front than I did on the inside.
- Die cut three essential shapes, two from white and one from smokey slate. Stamp your floral image on the white in black Momento ink. Color with blends. Adhere the second white essential shape to the back of the colored one so that the marker will not show through when it is adhered to the card front panel. Adhere this to the left flap, centering it to the whole card front when both flaps are closed.
- Stamp your greeting on the Smoley Slate essential die cut. Adhere this to the right flap, ensuring that it is covered by the white die cut when the card is closed.
- Stamp a floral image on the bottom right corner of the white layer in Soft Seafoam. Adhere this inside the card.
- Add pearls as desired.
This is a relatively simple fold, but very easy to create.
You can watch the video I did over on Facebook here on YouTube. While you are there, be sure to like and follow my page so that you don’t miss any of the fun! https://youtu.be/zVOLVa__004
I launched a new Line of branding clothing. Show your support for your favorite Spot for ideas and videos! There are two styles, both in 6 sizes and many colors–something for everyone!
Check out my online store here: https://my-stamping-spot.printify.me/products
If you wear one to any of my events, I will have a special surprise for you! And, as always, I am so grateful for your support!!

[shareaholic app="share_buttons" id="4832771"]