After taking a little hiatus from social media last week, I was energized and happy to be back sharing a cute new card featuring the Market Goodness Bundle and To Market DSP.
Aside from creating this colorful card, I walked the the DSP patterns and which dies coordinated with the papers. I also shared a way to get the look of a full DSP layer without wasting all the pretty paper that hides under a top layer.
Loving my vegetable garden, this DSP in this suite of products gets me excited for my first harvest. The images a bright and they look good enough to eat!!
To complete this card:
Stamp: Market Goodness
Ink: Blackberry Bliss, Peach Pie
Card stock: Crumb Cake cut to 8 1/2″ x 5 1/2″, scored at 4 1/4″
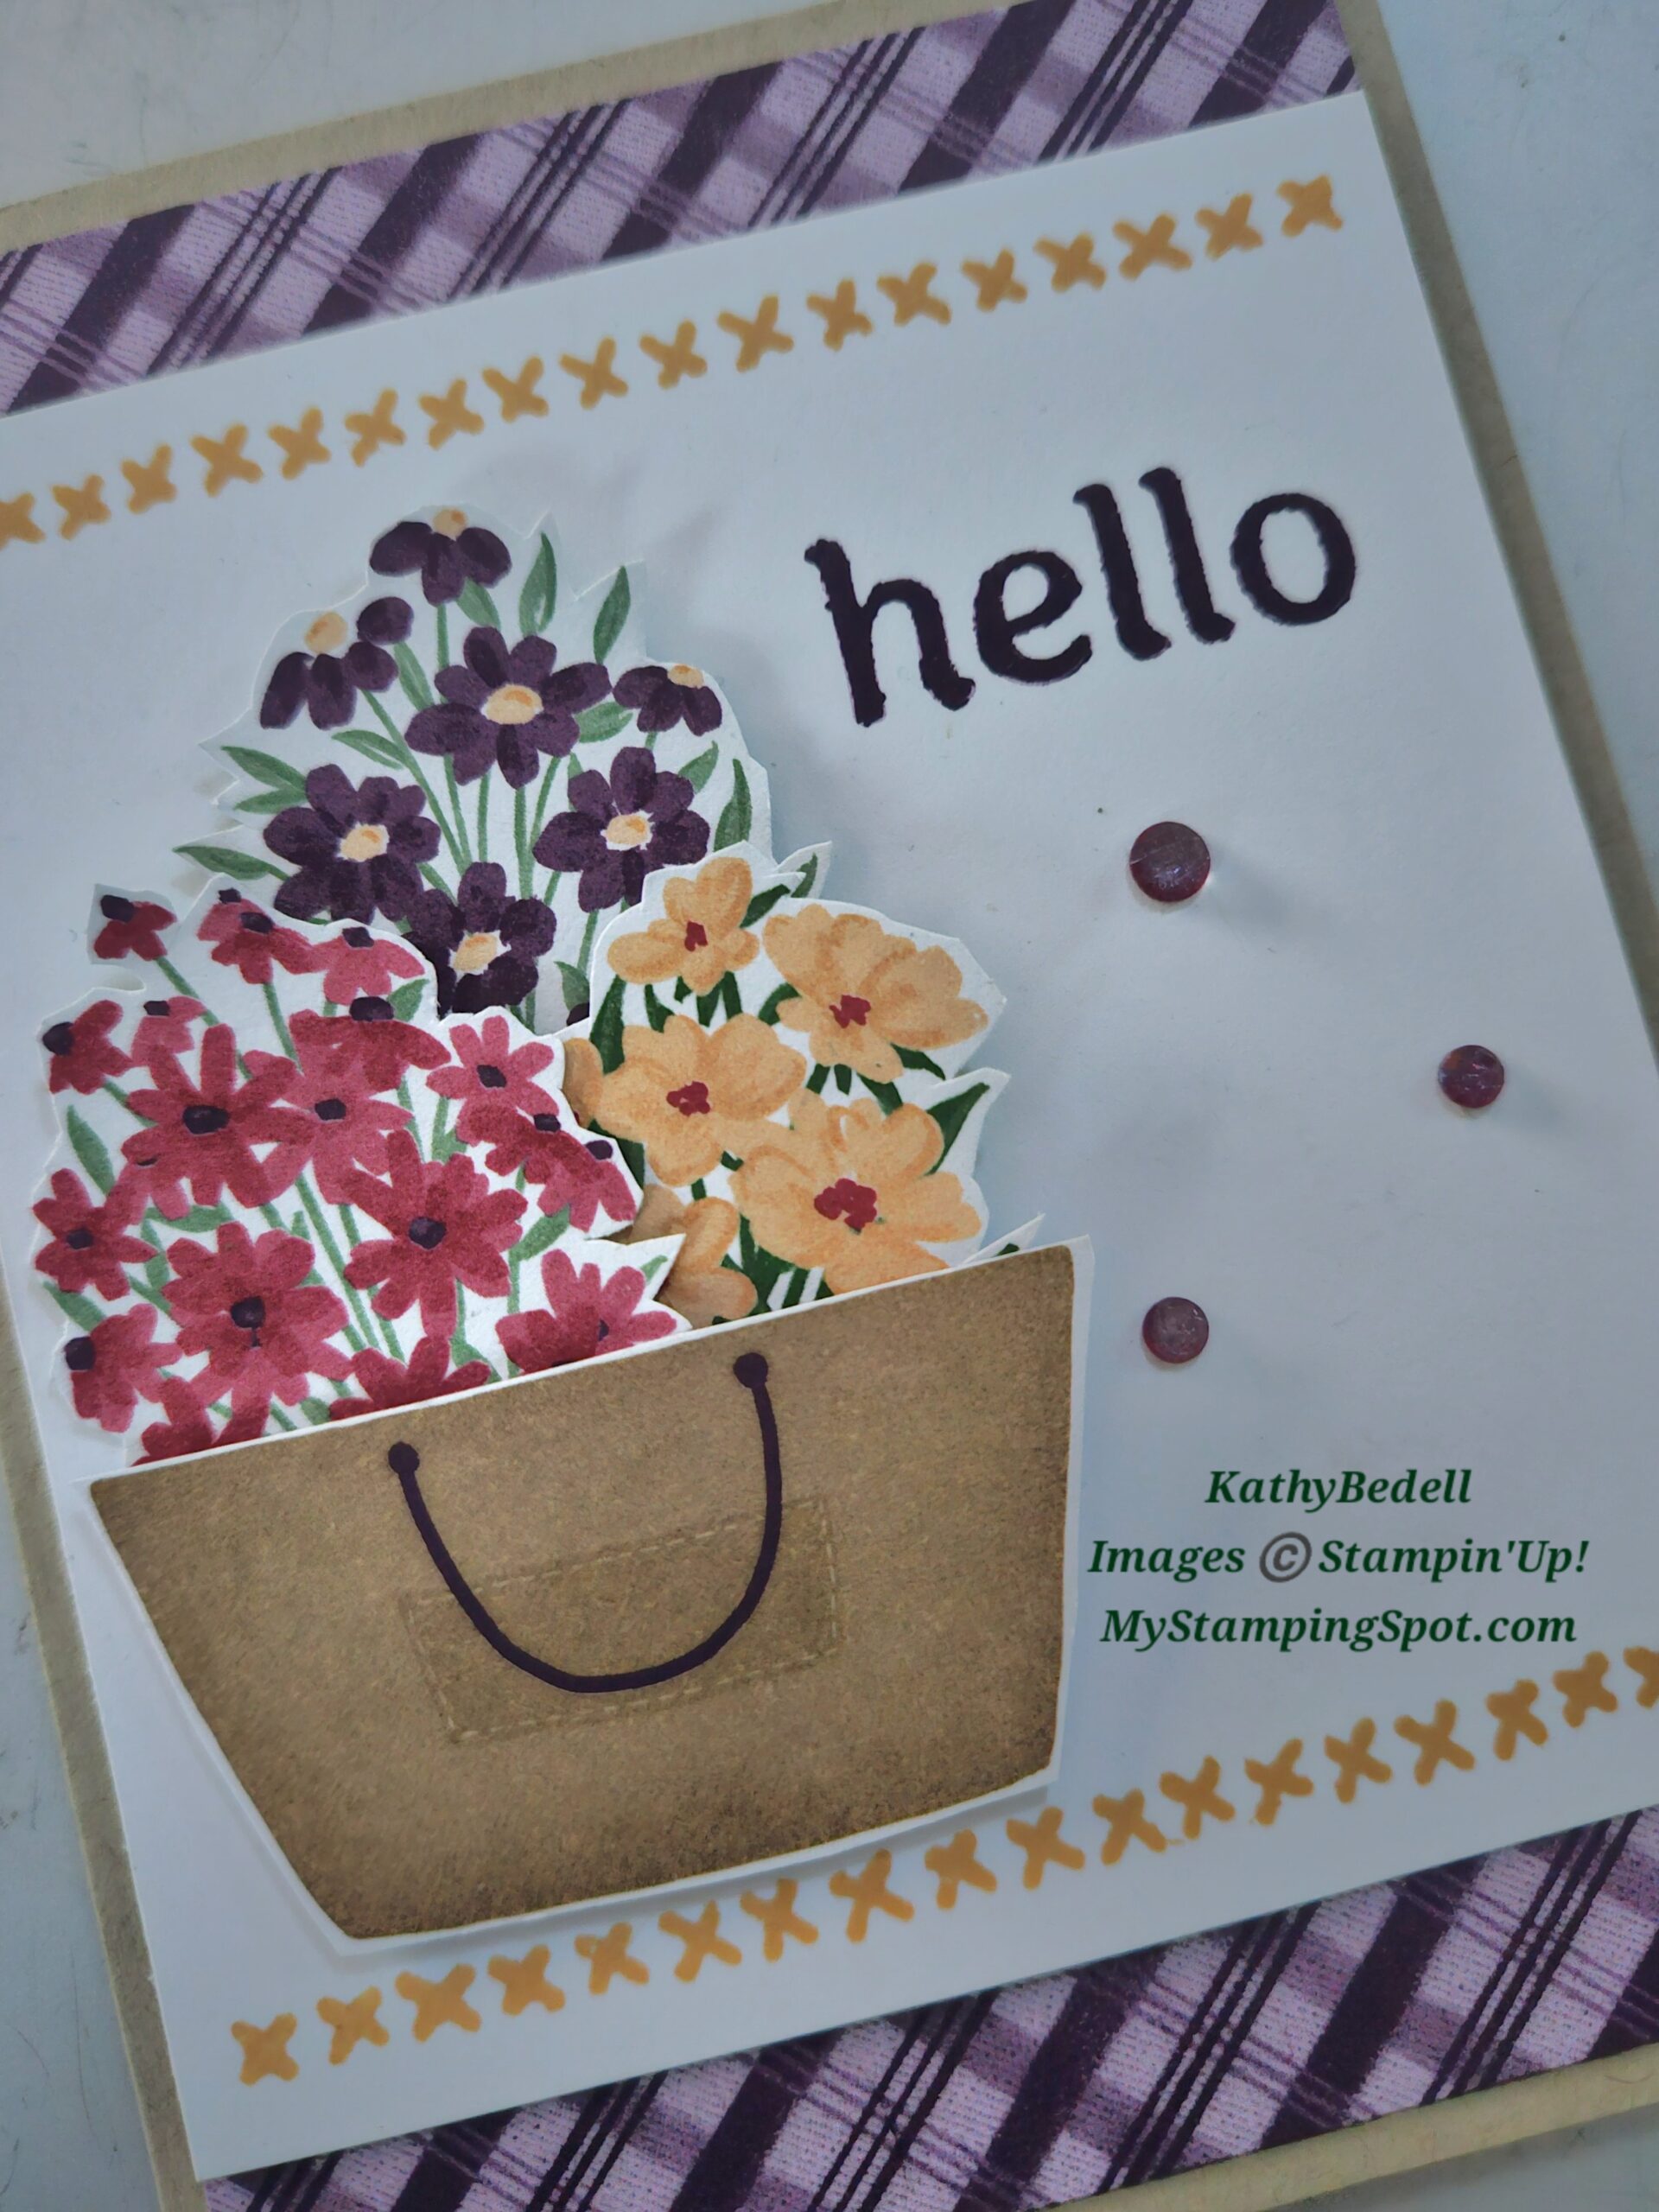
Basic white cut to 4″ x 4 1/4″ DSP cut to 1″ x 4″- cut two pieces
Hand snipped floral bouquets and a basket from the DSP.
Accessories: Purple Fine Shimmer Gems
Assembly:
- Fold the card base on the score line. Adhere the DSP strips to the top and the bottom of the card front.
- Stamp the crosshatch pattern along the top and bottom of the white piece of card stock. Stamp your greeting in the upper right hand corner of the white piece of card stock. *******Be sure to hold the white piece 4″ wide by 4 1/4″ long. Adhere this piece to the card front, placing it evenly over the DSP strips.
- Hand snip 3 floral bouquets and one basket from the DSP. Use dimensionals to pop these up onto the card front. You may need to trim the stems off the flowers like i did to get them to “fit” into the basket.
- Add gems as desired.
You can watch the full video here: https://youtu.be/L77xtyVptmc

[shareaholic app="share_buttons" id="4832771"]